

Are indoor WPC wall panels easy to install for DIYers?
Nov 27, 2025
Leave a message
Hey there, DIY enthusiasts! If you're looking to spruce up your indoor space, you might've considered indoor WPC wall panels. I'm an indoor WPC wall panel supplier, and I get this question a lot: Are indoor WPC wall panels easy to install for DIYers? Well, let's dig into it.
What are Indoor WPC Wall Panels?
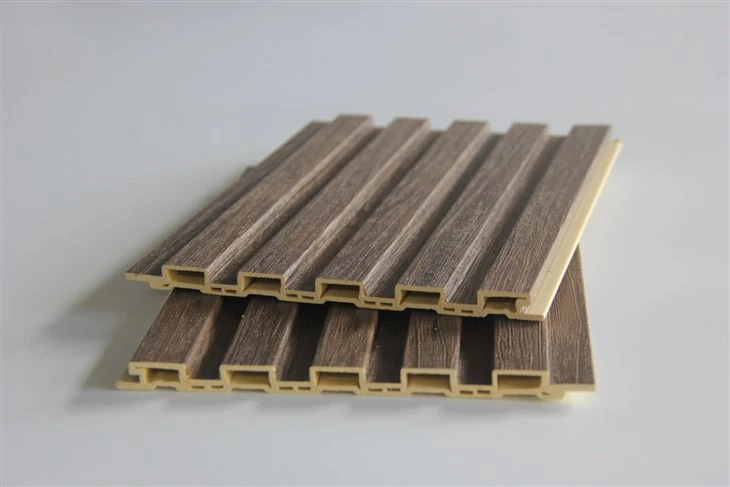
First off, let's quickly cover what WPC wall panels are. WPC stands for Wood - Plastic Composite. These panels are made by combining wood fibers and thermoplastics, creating a material that has the best of both worlds. It looks like wood, giving your indoor space a warm and natural feel, but it's also durable, moisture - resistant, and easy to maintain.
You can find a bunch of different types of indoor WPC wall panels on the market. For example, the Interior WPC Wall Panel is a popular choice. It comes in various colors and finishes, allowing you to match it with your existing interior decor. Then there's the China Fluted WPC Panel, which has a unique fluted design that adds a touch of elegance to any room. And of course, the WPC Fluted Wall Panel offers a similar stylish look.
Why DIY with Indoor WPC Wall Panels?
There are several reasons why DIYing with indoor WPC wall panels is a great idea. For starters, it can save you a ton of money. Hiring a professional installer can be expensive, and if you're on a budget, doing it yourself can significantly cut down on costs.

Secondly, it gives you complete control over the project. You can work at your own pace, take breaks when you need to, and make adjustments as you go. It's a great way to add a personal touch to your home. And let's not forget the satisfaction that comes with completing a DIY project. There's nothing quite like standing back and admiring a job well - done that you did all by yourself.
The Ease of Installation
Now, let's talk about the actual installation process. In general, indoor WPC wall panels are relatively easy to install, even for DIYers.
Tools Required
You won't need a whole bunch of fancy tools. The basic tools you'll need include a measuring tape, a saw (either a hand saw or a power saw depending on your preference and the thickness of the panels), a level, a drill, and some nails or screws. You might also need a caulking gun if you want to seal the edges for a more finished look.
Preparation
Before you start installing the panels, you need to prepare the wall. Make sure the wall is clean, dry, and flat. Remove any old wallpaper, paint, or debris. If there are any bumps or uneven areas, you can use a sanding block to smooth them out. It's also a good idea to measure the wall and plan out how you're going to arrange the panels. This will help you avoid any last - minute headaches.
Installation Steps
- Start at the Bottom: Begin by installing the first panel at the bottom of the wall. Use a level to make sure it's straight. You can secure it to the wall using nails or screws. Make sure to space the fasteners evenly to keep the panel in place.
- Join the Panels: Most indoor WPC wall panels come with a tongue - and - groove system. This makes it super easy to join the panels together. Simply slide the tongue of one panel into the groove of the next panel. You might need to give it a gentle tap with a rubber mallet to make sure it fits snugly.
- Cut the Panels: As you get to the edges or corners of the wall, you'll likely need to cut the panels to fit. Measure the area carefully and use your saw to make the cut. It's a good idea to make a test cut on a scrap piece of panel first to make sure you're getting the right size.
- Finish the Edges: Once all the panels are installed, you can finish the edges with a trim or molding. This will give the installation a more polished look. You can use a caulking gun to seal the edges and fill any small gaps.
Potential Challenges
Of course, no DIY project is without its challenges. One potential issue you might face is cutting the panels accurately. If you're not used to using a saw, it can be a bit tricky to get a straight and clean cut. But with a little practice and patience, you'll get the hang of it.
Another challenge could be dealing with uneven walls. Even if you've tried to smooth out the wall, there might still be some minor irregularities. In this case, you might need to use some shims to make sure the panels are flush against the wall.
Tips for a Successful DIY Installation
- Watch Tutorials: There are plenty of online tutorials that can walk you through the installation process step by step. Watching a few of these can give you a better understanding of what to expect and how to handle any issues that might come up.
- Take Your Time: Don't rush the installation. It's better to take your time and do it right than to try to finish quickly and end up with a sub - par result.
- Ask for Help: If you're feeling overwhelmed or if you run into a problem you can't solve, don't be afraid to ask for help. You can reach out to other DIYers in online forums or even ask a friend or family member who has some experience with home improvement projects.
Conclusion
So, are indoor WPC wall panels easy to install for DIYers? The answer is a resounding yes! With the right tools, a bit of preparation, and some patience, you can install these panels yourself and transform your indoor space.
If you're interested in purchasing indoor WPC wall panels for your next DIY project, I'd love to help. We have a wide range of high - quality panels to choose from, and our team can provide you with all the information and support you need. Whether you're a seasoned DIYer or just starting out, we're here to make your project a success. So, don't hesitate to reach out and start the conversation about your wall panel needs.
References
- General knowledge from years of experience in the indoor WPC wall panel industry.
- Online DIY home improvement resources and forums.