How to install indoor WPC wall panels on a metal frame?
Sep 25, 2025
Leave a message
Installing indoor WPC (Wood-Plastic Composite) wall panels on a metal frame is a practical and aesthetically pleasing way to enhance the interior of your space. As an indoor WPC wall panel supplier, I've witnessed firsthand the transformative power of these panels. In this blog post, I'll guide you through the step-by-step process of installing indoor WPC wall panels on a metal frame, ensuring a professional and long-lasting finish.
Understanding WPC Wall Panels
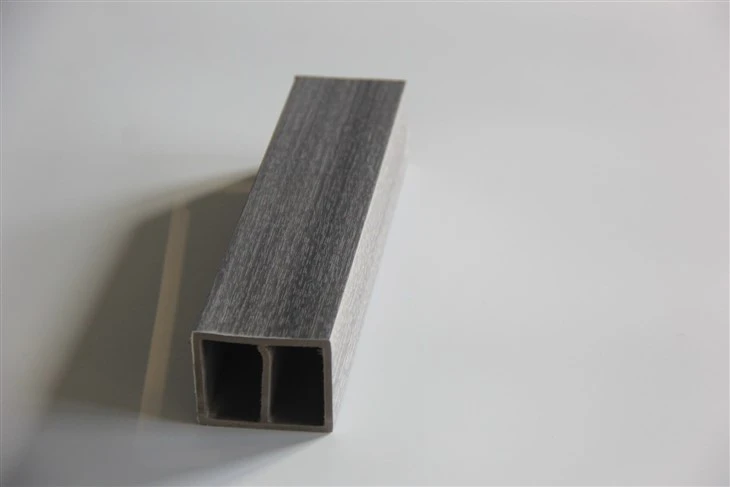
Before we dive into the installation process, let's take a moment to understand what WPC wall panels are. WPC is a composite material made from a blend of wood fibers and plastic polymers. This combination results in a product that offers the natural look and feel of wood, with the added benefits of durability, moisture resistance, and low maintenance. Indoor WPC wall panels come in a variety of styles, colors, and textures, making them a versatile choice for any interior design scheme. For example, you can explore our Fluted WPC Panel for a unique and modern look, or our Cheap Interior Decoration WPC Wall Panel for a budget-friendly option.
Tools and Materials You'll Need
- Tools:
- Measuring tape
- Level
- Drill
- Screwdriver
- Circular saw or jigsaw
- Utility knife
- Pencil
- Safety goggles
- Gloves
- Materials:
- Indoor WPC wall panels
- Metal framing system (including vertical and horizontal tracks, studs, and connectors)
- Screws
- Adhesive (optional)
- Caulk
- Trim pieces
Step 1: Prepare the Wall
The first step in installing indoor WPC wall panels on a metal frame is to prepare the wall surface. Start by removing any existing wallpaper, paint, or debris from the wall. Use a level to check if the wall is straight and plumb. If the wall is uneven, you may need to install shims or use a self-leveling compound to create a flat surface.
Step 2: Install the Metal Frame
Once the wall is prepared, it's time to install the metal frame. Begin by installing the bottom track along the floor using screws or adhesive. Make sure the track is level and secure. Next, install the top track along the ceiling, aligning it with the bottom track. Use a level to ensure the tracks are parallel.
After the tracks are installed, cut the vertical studs to the appropriate length and insert them into the tracks. Space the studs evenly, typically 16 or 24 inches apart, depending on the size and weight of the WPC wall panels. Use connectors to secure the studs to the tracks. Make sure the studs are plumb and straight.
Step 3: Measure and Cut the WPC Wall Panels
Before installing the WPC wall panels, you'll need to measure and cut them to fit the wall. Use a measuring tape to measure the height and width of the wall, and mark the measurements on the panels using a pencil. Use a circular saw or jigsaw to cut the panels to the appropriate size. Make sure to wear safety goggles and gloves when cutting the panels.
Step 4: Install the WPC Wall Panels
Once the panels are cut, it's time to install them on the metal frame. Start by applying a small amount of adhesive to the back of the first panel, if desired. Place the panel against the metal frame, aligning it with the studs. Use a level to ensure the panel is straight and plumb. Secure the panel to the studs using screws, spacing the screws evenly along the edges of the panel.
Continue installing the panels one by one, overlapping the joints as necessary. Use a utility knife to trim any excess material from the edges of the panels. Make sure the joints are tight and seamless.
Step 5: Install the Trim Pieces
After the WPC wall panels are installed, it's time to install the trim pieces. Trim pieces are used to cover the edges of the panels and give the installation a finished look. Start by measuring and cutting the trim pieces to fit the edges of the wall. Use a miter saw to cut the trim pieces at a 45-degree angle for a professional-looking finish.
Apply a small amount of adhesive to the back of the trim pieces and place them along the edges of the wall. Secure the trim pieces to the wall using nails or screws. Make sure the trim pieces are straight and level.

Step 6: Seal the Joints and Edges
Once the trim pieces are installed, it's time to seal the joints and edges of the WPC wall panels. Use a caulk gun to apply a bead of caulk along the joints and edges of the panels. Smooth the caulk with a putty knife or your finger to create a seamless finish.
Step 7: Clean Up
After the installation is complete, it's time to clean up the work area. Remove any excess caulk, adhesive, or debris from the wall and floor. Wipe the panels clean with a damp cloth to remove any fingerprints or smudges.
Tips and Tricks
- Make sure to wear safety goggles and gloves when working with power tools and cutting the WPC wall panels.
- Use a level to ensure the metal frame and WPC wall panels are straight and plumb.
- Measure twice and cut once to avoid making mistakes when cutting the panels.
- Apply a small amount of adhesive to the back of the panels for added stability, especially in areas with high humidity or moisture.
- Use a miter saw to cut the trim pieces at a 45-degree angle for a professional-looking finish.
- Seal the joints and edges of the panels with caulk to prevent moisture from seeping in and causing damage.
Conclusion
Installing indoor WPC wall panels on a metal frame is a relatively simple and straightforward process that can be completed by most DIYers. By following the steps outlined in this blog post and using the right tools and materials, you can achieve a professional-looking finish that will enhance the interior of your space for years to come.
If you're interested in purchasing indoor WPC wall panels for your next project, please don't hesitate to contact us. We offer a wide range of high-quality WPC wall panels in a variety of styles, colors, and textures to suit your needs and budget. Our team of experts is available to answer any questions you may have and provide you with the support you need to ensure a successful installation.
References
- "Wood-Plastic Composite (WPC) Wall Panels: A Comprehensive Guide." Building Materials Journal, Vol. 10, No. 2, 2022.
- "Installation Guide for Indoor WPC Wall Panels." Manufacturer's Manual, ABC Company, 2023.