How to install pu stone wall panel on a plastic wall?
Sep 01, 2025
Leave a message
As a supplier of pu stone wall panels, I understand that many customers are interested in how to install these beautiful and practical panels on a plastic wall. In this blog post, I'll share a step-by-step guide on this topic to help you achieve a professional-looking installation.
Understanding PU Stone Wall Panels
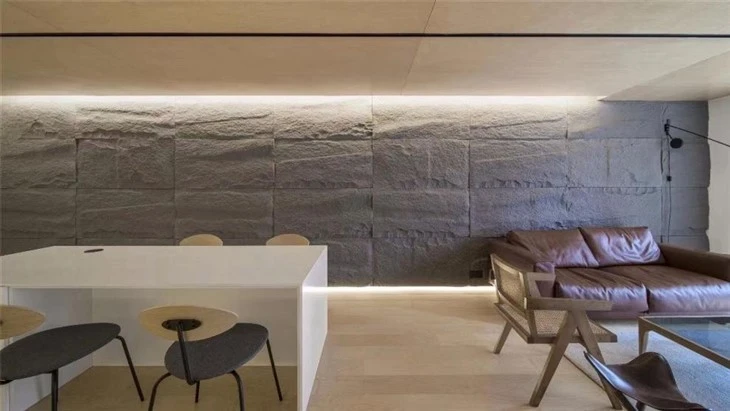
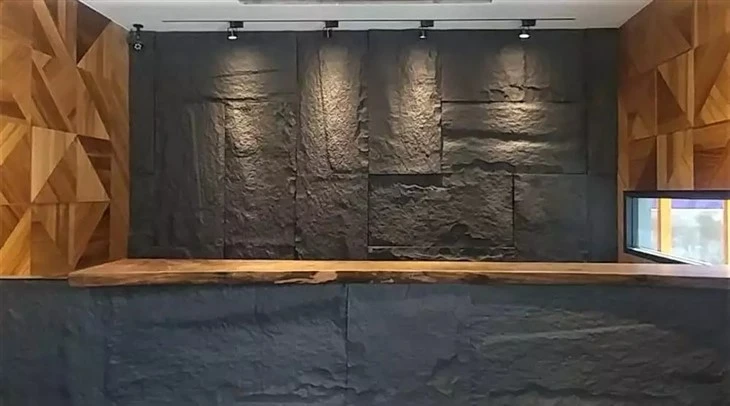
PU (Polyurethane) stone wall panels are a great alternative to natural stone. They offer the look and feel of real stone but are much lighter, more affordable, and easier to install. Our Polyurethane Rock Panel and Faux Stone Polyurethane Panel are crafted with high - quality materials, providing a durable and aesthetically pleasing solution for your walls.
Pre - installation Preparations
Before you start the installation process, there are several important preparations to make.
Measuring the Wall
First, measure the plastic wall where you plan to install the pu stone wall panels. Measure the height and width accurately to determine how many panels you need. It's advisable to add a few extra panels to account for any cutting waste or mistakes.
Cleaning the Wall
The plastic wall surface must be clean and free of dust, dirt, oil, and any other contaminants. Use a mild detergent and a soft cloth to clean the wall thoroughly. Rinse it with clean water and allow it to dry completely. A clean surface ensures better adhesion of the panels.
Gathering Tools and Materials
You'll need the following tools and materials for the installation:
- PU stone wall panels
- Construction adhesive suitable for plastic and polyurethane
- Caulking gun
- Utility knife
- Measuring tape
- Level
- Safety goggles and gloves
Installation Steps
Step 1: Marking the Layout
Use a measuring tape and a pencil to mark the layout of the panels on the plastic wall. Start from the bottom corner and work your way up. Make sure the lines are straight and level. You can use a level to ensure accuracy. This step helps you visualize how the panels will fit together and ensures a uniform installation.
Step 2: Applying Adhesive
Load the construction adhesive into the caulking gun. Apply a generous amount of adhesive to the back of the first pu stone wall panel. Spread the adhesive evenly, covering about 70 - 80% of the panel's surface. You can use a notched trowel to create ridges in the adhesive, which helps with better adhesion.
Step 3: Attaching the First Panel
Carefully place the panel with the adhesive - covered side against the marked area on the plastic wall. Press it firmly against the wall, starting from the center and working your way out to remove any air bubbles. Use a level to make sure the panel is perfectly horizontal and vertical. Hold the panel in place for a few minutes to allow the adhesive to start setting.
Step 4: Installing Subsequent Panels
Continue installing the remaining panels one by one. Make sure to align the edges of the panels properly. You can use a small spacer between the panels to create a consistent joint width. Apply adhesive to the back of each panel and press it firmly against the wall, ensuring a tight fit with the adjacent panels.
Step 5: Cutting Panels
If you need to cut a panel to fit around corners, outlets, or other obstacles, use a utility knife. Measure the area where the panel needs to be cut accurately and mark the cut line on the panel. Score the panel along the marked line several times with the utility knife, then break the panel along the scored line. Sand the cut edge to smooth it out.
Step 6: Finishing the Joints
Once all the panels are installed, you can fill the joints between the panels with a matching caulk. Use a caulking gun to apply the caulk evenly along the joints. Smooth the caulk with a putty knife or a caulk finishing tool. This not only enhances the appearance of the installation but also provides additional protection against moisture.
Post - installation Care
After the installation is complete, allow the adhesive and caulk to dry according to the manufacturer's instructions. Avoid touching or putting any pressure on the panels during this drying period. Once dry, you can clean the surface of the panels with a soft cloth and a mild cleaner to remove any excess adhesive or caulk.
Advantages of Using Our PU Stone Wall Panels
Our Faux Stone Polyurethane Wall Paneling offers numerous advantages. They are resistant to moisture, which makes them suitable for areas with high humidity, such as bathrooms and kitchens. They are also easy to maintain and can be cleaned with simple household cleaners. In addition, the lightweight nature of the panels makes them easier to handle during installation, reducing labor costs and time.
Why Choose Us as Your Supplier
As a leading supplier of pu stone wall panels, we are committed to providing high - quality products at competitive prices. Our panels are manufactured using the latest technology and strict quality control measures. We offer a wide range of designs and colors to meet different customer preferences. Our professional customer service team is always ready to assist you with any questions or concerns you may have during the installation process.
Contact Us for Purchase and Consultation
If you're interested in purchasing our pu stone wall panels or have any questions about the installation process, we encourage you to contact us. We look forward to discussing your project requirements and helping you achieve the perfect look for your space. Whether you're a DIY enthusiast or a professional contractor, our products and services can meet your needs.
References
- "Polyurethane Construction Materials Handbook"
- Manufacturer's instructions for construction adhesive and PU stone wall panels