How to install PVC ceiling boards on a wooden ceiling frame?
Jun 09, 2025
Leave a message
Hey there! If you're looking to spruce up your space with a fresh, modern look, installing PVC ceiling boards on a wooden ceiling frame is a great way to go. As a PVC ceiling board supplier, I've seen firsthand how these boards can transform a room. They're durable, easy to clean, and come in a variety of styles and colors. In this blog, I'll walk you through the step-by-step process of installing PVC ceiling boards on a wooden frame, so you can achieve a professional-looking finish in no time.
Step 1: Gather Your Materials
Before you start the installation process, you'll need to gather all the necessary materials. Here's what you'll need:
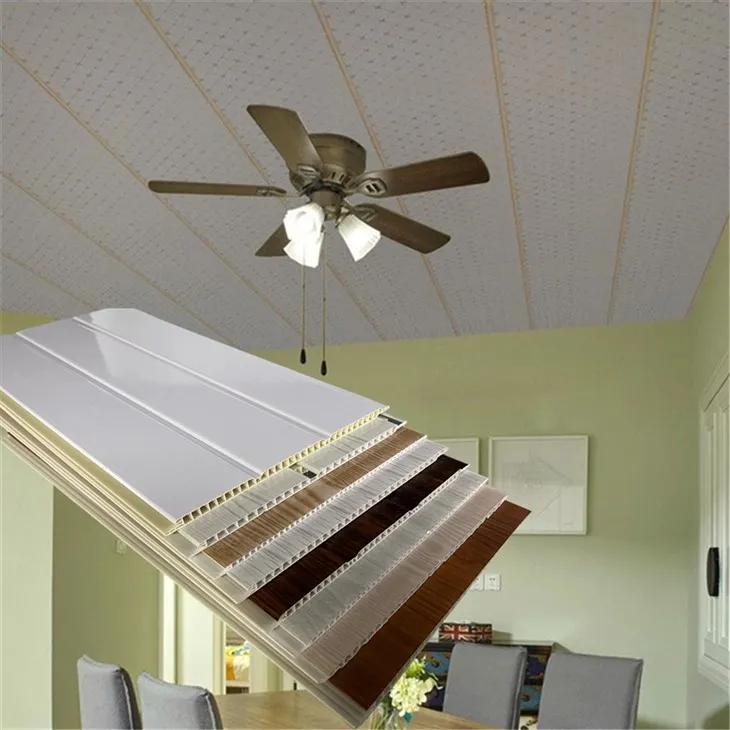
- PVC ceiling boards: You can choose from a wide range of options, including PVC White Ceiling Panel for a classic look or Cheap White PVC Ceiling if you're on a budget. For porch areas, Cheap PVC Porch Ceiling is a great choice.
- Wooden ceiling frame: Make sure the frame is sturdy and level. You may need to repair or reinforce it before installation.
- Measuring tape: To measure the dimensions of the ceiling and the PVC boards.
- Saw: To cut the PVC boards to the correct size.
- Screwdriver or drill: To attach the PVC boards to the wooden frame.
- Screws or nails: To secure the PVC boards in place.
- Adhesive: Optional, but it can provide extra stability.
- Caulk gun and caulk: To fill in any gaps between the boards.
- Safety equipment: Such as gloves and safety glasses.
Step 2: Measure and Plan
The first step in any installation project is to measure the ceiling accurately. Use a measuring tape to determine the length and width of the ceiling. Then, measure the PVC boards to ensure they will fit properly. It's a good idea to add a little extra length to the boards to account for any cutting errors.
Once you have the measurements, plan out how you want to lay the PVC boards. You can install them horizontally, vertically, or diagonally, depending on your preference and the style of the room. Mark the layout on the wooden frame using a pencil or chalk.
Step 3: Prepare the Wooden Frame
Before installing the PVC boards, you need to prepare the wooden frame. Make sure it is clean, dry, and free of any debris. If the frame is uneven or has any bumps, you may need to sand it down to create a smooth surface.
If the wooden frame is not level, you can use shims to adjust it. Place the shims between the frame and the ceiling joists to level it out. Make sure the frame is securely attached to the ceiling joists using screws or nails.
Step 4: Cut the PVC Boards
Once the wooden frame is ready, it's time to cut the PVC boards to the correct size. Use a saw to make straight cuts. You can use a hacksaw, a jigsaw, or a circular saw, depending on the type of PVC boards you have.
When cutting the boards, make sure to wear safety glasses and gloves to protect yourself from any flying debris. Measure twice and cut once to ensure accurate cuts. If you need to make curved cuts, you can use a jigsaw or a coping saw.
Step 5: Install the PVC Boards
Now it's time to start installing the PVC boards. Begin by attaching the first board to the wooden frame using screws or nails. Make sure the board is level and aligned with the layout marks. Use a screwdriver or drill to drive the screws or nails through the board and into the frame.

Continue installing the remaining boards, working your way across the ceiling. Make sure to leave a small gap between each board to allow for expansion and contraction. You can use a spacer to ensure consistent gaps.
If you need to join two boards together, you can use a PVC joint or adhesive. Apply the adhesive to the edges of the boards and press them together firmly. Make sure the joint is straight and flush.
Step 6: Secure the PVC Boards
Once the PVC boards are in place, you need to secure them to the wooden frame. Use screws or nails to attach the boards to the frame at regular intervals. Make sure the screws or nails are long enough to penetrate the frame but not so long that they go through the other side.
If you're using adhesive, apply it to the back of the boards before attaching them to the frame. Press the boards firmly against the frame to ensure a good bond. You may need to use clamps to hold the boards in place while the adhesive dries.
Step 7: Fill in the Gaps
After installing the PVC boards, you may notice some gaps between them. Use a caulk gun and caulk to fill in these gaps. Choose a caulk that matches the color of the PVC boards for a seamless look.
Apply the caulk along the gaps and smooth it out using a putty knife or your finger. Make sure to remove any excess caulk before it dries.
Step 8: Finishing Touches
Once the caulk has dried, you can add some finishing touches to the PVC ceiling. You can paint the boards to match the color of the room or leave them as they are. If you choose to paint the boards, make sure to use a paint that is suitable for PVC.
You can also add trim or molding around the edges of the ceiling to give it a more finished look. There are many different styles and colors of trim available, so you can choose one that complements the style of the room.
Step 9: Clean Up
After completing the installation, clean up the work area. Remove any debris, tools, and materials from the room. Wipe down the PVC boards with a damp cloth to remove any dust or dirt.
Why Choose Our PVC Ceiling Boards?
As a PVC ceiling board supplier, we offer high-quality products at competitive prices. Our PVC ceiling boards are made from durable materials that are resistant to moisture, mold, and mildew. They are easy to install and maintain, making them a great choice for both DIYers and professional contractors.
We have a wide range of styles and colors to choose from, so you can find the perfect PVC ceiling boards to match your decor. Whether you're looking for a classic white ceiling or a more modern design, we have something for you.
Contact Us for Your PVC Ceiling Board Needs
If you're interested in purchasing PVC ceiling boards for your project, we'd love to hear from you. Our team of experts can help you choose the right products for your needs and provide you with all the information you need to install them.
Contact us today to start the conversation. We're here to help you create the perfect ceiling for your space.
References
- "PVC Ceiling Installation Guide." Home Improvement Magazine.
- "How to Install PVC Ceiling Panels." DIY Network.
- "Tips for Installing PVC Ceiling Boards." Building Materials Today.